The following steps is an example for renaming a Pluggable database (PDB) TESTPDB to NEWPDB and its associated service.
SQL> alter pluggable database TESTPDB close instances=all;
Pluggable database altered.
SQL> ALTER PLUGGABLE DATABASE TESTPDB OPEN RESTRICTED FORCE;
Pluggable database altered.
SQL> ALTER PLUGGABLE DATABASE RENAME GLOBAL_NAME TO NEWPDB;
Pluggable database altered.
SQL> ALTER PLUGGABLE DATABASE NEWPDB close instances=all;
Pluggable database altered.
SQL> ALTER PLUGGABLE DATABASE NEWPDB open instances=all;
Pluggable database altered.
SQL>
SQL> connect / as sysdba
Connected.
SQL> select name from v$pdbs;
NAME
------------------------------
PDB$SEED
NEWPDB
Alert log.
alter pluggable database TESTPDB close instances=all
Tue Sep 15 13:41:05 2015
ALTER SYSTEM: Flushing buffer cache inst=1 container=3 local
Tue Sep 15 13:41:16 2015
Pluggable database TESTPDB closed
Completed: alter pluggable database TESTPDB close instances=all
ALTER PLUGGABLE DATABASE OPEN RESTRICTED FORCE
Tue Sep 15 13:41:23 2015
This instance was first to open pluggable database TESTPDB (container=3)
Database Characterset for TESTPDB is WE8ISO8859P1
Opening pdb TESTPDB (3) with no Resource Manager plan active
Pluggable database TESTPDB opened read write
Completed: ALTER PLUGGABLE DATABASE OPEN RESTRICTED FORCE
ALTER PLUGGABLE DATABASE RENAME GLOBAL_NAME TO NEWPDB
Tue Sep 15 13:41:38 2015
ALTER SYSTEM: Flushing buffer cache inst=1 container=3 local
Tue Sep 15 13:41:50 2015
Pluggable database TESTPDB closed
This instance was first to open pluggable database TESTPDB (container=3)
Database Characterset for TESTPDB is WE8ISO8859P1
Tue Sep 15 13:41:51 2015
Successfully created internal service NEWPDB at open
Tue Sep 15 13:41:51 2015
ALTER SYSTEM: Flushing buffer cache inst=1 container=3 local
This instance was first to open pluggable database NEWPDB (container=3)
Database Characterset for NEWPDB is WE8ISO8859P1
Opening pdb NEWPDB (3) with no Resource Manager plan active
Pluggable database NEWPDB opened read write
Completed: ALTER PLUGGABLE DATABASE RENAME GLOBAL_NAME TO NEWPDB
Tue Sep 15 14:25:33 2015
ALTER PLUGGABLE DATABASE NEWPDB close instances=all
Tue Sep 15 14:25:34 2015
ALTER SYSTEM: Flushing buffer cache inst=1 container=3 local
Tue Sep 15 14:25:47 2015
Pluggable database NEWPDB closed
Completed: ALTER PLUGGABLE DATABASE NEWPDB close instances=all
ALTER PLUGGABLE DATABASE NEWPDB open instances=all
Tue Sep 15 14:25:58 2015
This instance was first to open pluggable database NEWPDB (container=3)
Database Characterset for NEWPDB is WE8ISO8859P1
Opening pdb NEWPDB (3) with no Resource Manager plan active
Pluggable database NEWPDB opened read write
Completed: ALTER PLUGGABLE DATABASE NEWPDB open instances=all
Monday, October 5, 2015
Wednesday, July 8, 2015
How to Add or Configure Memory on Exadata
On the Exadata X2 the following are
the four valid memory configurations. Please note on each database compute node
motherboard has 18 memory sockets or slots for the Memory DIMMS.
1. (12 x 8GB DIMMS, as shipped from
Oracle) - 96GB
2. (12 x 16GB DIMMS leaving the 6
plastic inserts in which is simply replacing the previous 12x 8GB DIMMS to 16GB
DIMMS) - 192GB
3. (12 x 8 GB and 6 x 16GB) - 192GB
4. (18 x 16GB DIMMS) - 288GB, The
Maximum for Exadata X2 compute node.
I came across a client that did not
have a supported memory configuration in their Exadata X2-2.
They had (6 x 8GB DIMMS, 12 x 16GB
DIMMS) => 240GB, which is not supported by Oracle on the Exadata X2-2
hardware as a valid memory combination.
That configuration may lead to
system performance and may not achieve your full Exadata operational ability,
and furthermore there is a potential, which may lead to a system kernel bug.
The steps provided here were used to
put the correct support memory configuration of 192GB.
These changes can be staged prior
just before adding the memory to the each of the database compute nodes. Once
the parameters are staged then the memory can be added by Oracle field support
and then the nodes can be rebooted for the changes to take effect.
As per note Oracle Support note:
How to Increase Database Allocated Memory on Exadata Database Server
(Doc ID 1346747.1)
The Best Practice for Exadata is to
use hugepages. The formula used to set
the huge pages is usually 50-75% of the total physical memory on the server.
You can allocate additional memory to the SGA buffer cache. Do not exceed 50% of RAM if you expect a
large connection load, or large PGA usage.
Perhaps up to 75% of RAM if you monitor PGA usage and connection load
very closely. The memory allocated to huge pages
is always pinned and is never paged or swapped out.
In our setup we will set the
hugepages to be 60% of the total physical memory.
Please note an OS page size on Linux
is 2M or 2048KB.
· 60% of 192GB is 115.2GB
· Convert 115.2GB to KB => 115.2 * 1024 to get # in MB
(117964.8) then again multiply by 1024 to get value in KB 120795955.2
· Divide 120795955.2 KB by the Linux pagesize which is 2048KB,
the value will be 58982 pages but we round down to the nearest whole number to
set the number of hugepages.
1. Save backup copy of the
/etc/sysctl.conf file then update the kernel file /etc/sysctl.conf , set vm.nr_hugepages = 58982
2. Set memlock kernel parameter in KB
this value should be less then the total physical memory on the server. This
value represents the maximum locked in memory space on the OS. In our example
we set memlock to about 191GB. Save a backup copy of the
/etc/security/limits.conf then update the file.
/etc/security/limits.conf
oracle
soft memlock 200278016
oracle
hard memlock 200278016
3. Set
shmall memory pages to be less than the total physical memory and larger than
the sum of all of SGAs. On the server in our setup the sum of all SGAs will be
115.2GB or less so we will use 115.2GB as our number to calculate shmall.
Convert 115.2GB to Bytes (123695058124.8)
Divide by the 4KB OS page size not to be confused with the
hugepage size.
123695058124.8/4096 => 30198988.8
4. Save backup copy of the /etc/sysctl.conf then update the
file
/etc/sysctl.conf set - kernel.shmall =
30198988
Increase
the SGA and PGA parameters across the database(s) if needed for
performance. Please note the total sum of the sga_target initialization parameter
value across all instances on the node should be less than or equal to the
value of the huge pages of 115.2GB that we are using in this example.
PGA is not
part of the hugepages and can be accordingly however I do recommend leaving at
least 5GB free for the OS.
Please
note memory_target should not be set
which is part of AMM (Automatic Memory Management) as it is not compatible with
huge pages. ASMM (Automatic Shared Memory Management) should be used instead.
The sga_target parameter is compatible with ASMM.
The Oracle
Field Engineer will make changes to the Database compute nodes and add or adjust
the memory configuration and then startup the compute nodes once complete.
Run the free –g command to confirm the memory is
192GB it may say 188GB due to motherboard settings.
To verify
hugepages has been set correctly on the OS please run the following command on
each node. The values below are just an example and do not reflect the settings
we have.
$ cat
/proc/meminfo|grep -i HugePages_Total
HugePages_Total: 58982
For each database please verify in the database alert
log hugepages is being used. The values below is an example from the alert log
file for the instance.
Starting ORACLE instance (normal)
************************
Large Pages Information *******************
Per
process system memlock (soft) limit = UNLIMITED
Total
Shared Global Region in Large Pages = 40 GB (100%)
...
Tuesday, July 7, 2015
New Exadata book released!
I am excited about the new book "Oracle Exadata Expert's Handbook" that has been finally released!
Amazon Exadata book link
I helped author one chapter in the book and also assisted on one as well.
I am very thankful to be part of a strong team of authors Tariq Farooq, Charles Kim, Nitin Vengurlekar, Sridhar Avantsa, Guy Harrison and Syed Jaffar Hussain. Thanks to Charles Kim for inviting me to help on this exciting project.
I hope everyone will benefit from the knowledge in the book, there is plenty of good content to read and learn from.
Saturday, July 4, 2015
DBaaS: Deploying Databasess quickly from OEM @ Dallas Oracle Users Group
I will be speaking at the Dallas Oracle Users Group - DOUG on July 23, 2015 5pm-7:15pm. The topic will be "DBaaS: Deploying Databases quickly from OEM @ Dallas Oracle Users Group"
Please come and learn how to setup your Cloud infrastructure in Oracle Enterprise Manager 12c and deploy databases to it with a few clicks using Database as a Service (DBaaS)! More information at the below link.
http://viscosityna.com/event/dbaas-deploying-dbs-quickly-from-oem-dallas-oracle-users-group/
Thursday, May 21, 2015
Exadata Venom Vulnerability - CVE-2015-3456
Recently a new Linux vulnerability has been found its called Venom Vulnerability - CVE-2015-3456. The details are documented on My Oracle Support Doc ID 2011997.1.
Details on the Venom vulnerability are as follows which is documented in in the Oracle Linux CVE URL http://linux.oracle.com/cve/CVE-2015-3456.html
"An out-of-bounds memory access flaw was found in the way QEMU's virtual Floppy Disk Controller (FDC) handled FIFO buffer access while processing certain FDC commands. A privileged guest user could use this flaw to crash the guest or, potentially, execute arbitrary code on the host with the privileges of the host's QEMU process corresponding to the guest."
Please note The issue listed here only affects Oracle Database Machine database servers running Oracle VM (OVM). Database servers running physical installations (no OVM) and Exadata storage cells are not vulnerable.
The following My Oracle Support document is also very useful. It contains updated information on impacts to Oracle Exadata based on Security issues and Common Vulnerabilities and Exposures (CVE) reported against Linux. There is a complete table with all of the CVE information and a link to the Oracle Support document with the fix for the issue as well.
Responses to common Exadata security scan findings (Doc ID 1405320.1)
Tuesday, April 14, 2015
Disk overhead Exadata X2
I had a discussion recently about the available storage from the Exadata storage cells in this case it was an X2. Please note the disks are advertised as 2TB in size however there is a small overhead at each stage from the physicaldisk layer then to the celldisk layer which I show in this posting.
From the below example we can see the physical disk size is 2TB from the makemodel property but the physicalsize is about 1862.66GB this is a drop of 185.34GB from 2048G.
CellCLI> list physicaldisk 20:0 detail
name: 20:0
deviceId: 19
diskType: HardDisk
enclosureDeviceId: 20
errMediaCount: 0
errOtherCount: 0
foreignState: false
luns: 0_0
makeModel: "SEAGATE ST32000SSSUN2.0T"
physicalFirmware: 061A
physicalInsertTime: xxxxxxxxxxxxxxxxxxx
physicalInterface: sas
physicalSerial: xxxxxxxxxxxxxxxxxxx
physicalSize: 1862.6559999994934G
slotNumber: 0
status: normal
We can see from the celldisk level the size is being reported as about 1832.59GB another drop of about 30GB.
CellCLI> list celldisk CD_00_cel01 detail
name: CD_00_cel01
comment:
creationTime: xxxxxxxxxxxxxxxxxxx
deviceName: /dev/sda
devicePartition: /dev/sda3
diskType: HardDisk
errorCount: 0
freeSpace: 0
id: xxxxxxxxxxxxxxxxxxx
interleaving: none
lun: 0_0
physicalDisk: xxxxxxxxxxxxxxxxxxx
raidLevel: 0
size: 1832.59375G
status: normal
cel01: size: 1832.59375G
cel01: size: 1832.59375G
cel01: size: 1861.703125G
cel01: size: 1861.703125G
cel01: size: 1861.703125G
cel01: size: 1861.703125G
cel01: size: 1861.703125G
cel01: size: 1861.703125G
cel01: size: 1861.703125G
cel01: size: 1861.703125G
cel01: size: 1861.703125G
cel01: size: 1861.703125G
Finally we can see with the overhead at each level starting from a 2TB physical disk down to 1832GB of usable space to be used in ASM before we add the disk to a diskgroup with a NORMAL or HIGH redundancy level which will reduce the available space even further with ASM mirroring. We get about 89.5% of usable disk storage for each 2TB disk for an overhead of 10.5% which only applies to the first and second disk for overhead in the cell storage node. The remaining celldisks have 1861.7GB disks which is small overhead of about 1GB.
One more item to note the grid disk size will match the size reported in v$asm_disk since the grid disks are presented in ASM.
CellCLI> list griddisk DATA_CD_00_cel01 detail
name: DATA_CD_00_cel01
asmDiskgroupName: DATA
asmDiskName: DATA_CD_00_CEL01
asmFailGroupName: CEL01
availableTo:
cachingPolicy: default
cellDisk: CD_00_cel01
comment:
creationTime: xxxxxxxxxxxxxxxxxxx
diskType: HardDisk
errorCount: 0
id: xxxxxxxxxxx
offset: 32M
size: 1466G
status: active
select name, TOTAL_MB/1024 from v$asm_disk ;
NAME TOTAL_MB/1024
------------------------------ -------------
...
DATA_CD_01_CEL01 1466
....
Please keep this in mind when doing sizing for diskgroups and future capacity planning in setting up your Exadata storage.
Wednesday, April 8, 2015
Automate Deleting a Database
Delete a RAC database with DBCA and GUI and command line.
I wanted to demonstrate a simple way to delete or drop a RAC database using the Database Configuration Assistant. I have done this several times manually and decided to use DBCA to do this task easily which helps to automate the process and save time.
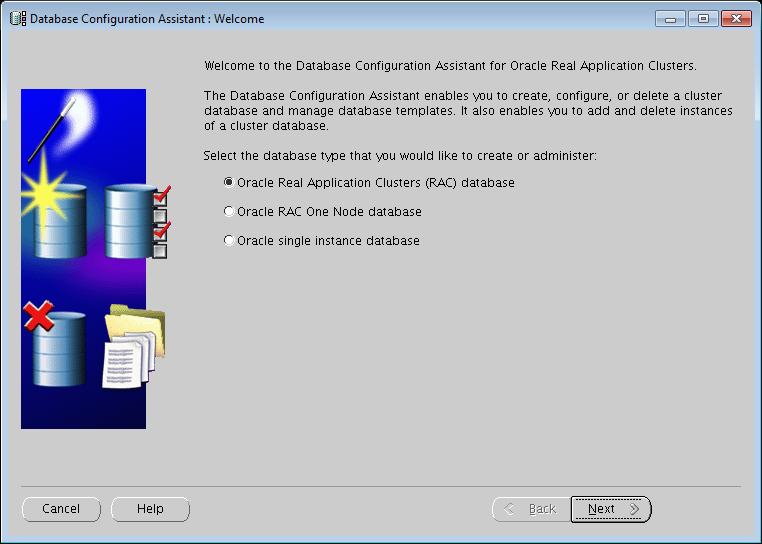
- Set the appropriate database home then invoke dbca as the oracle user from the command line.
- Select RAC database
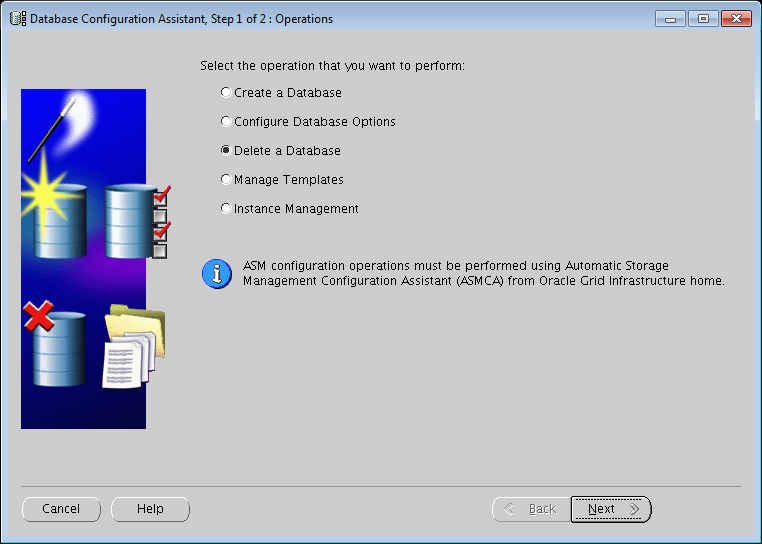
- Select the option to Delete a Database.

- Select the database to delete then click Finish.

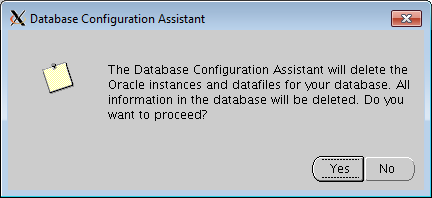
- Confirm Yes to delete all of the Oracle instances and datafiles for your database.
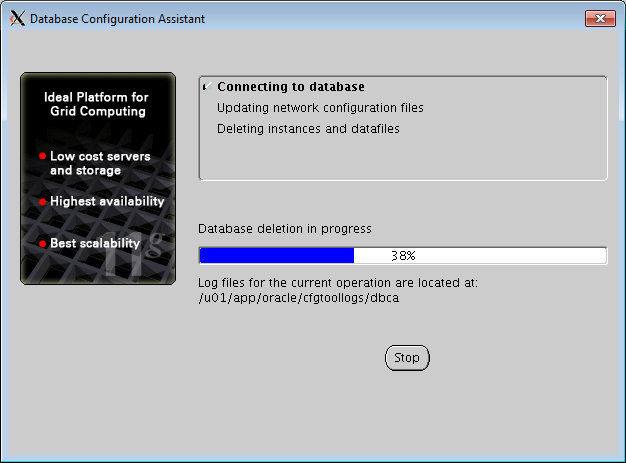
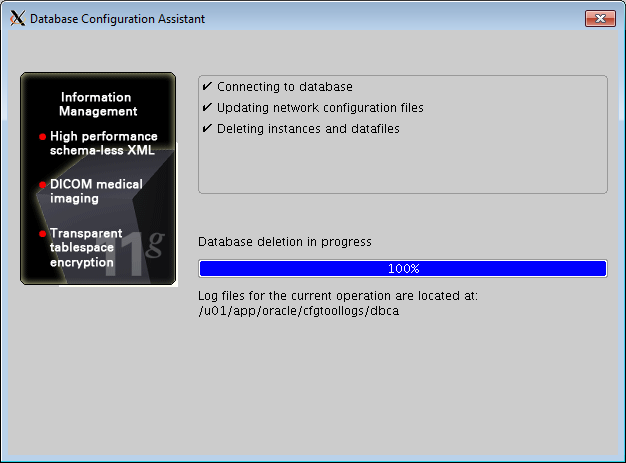
- Monitor the progress
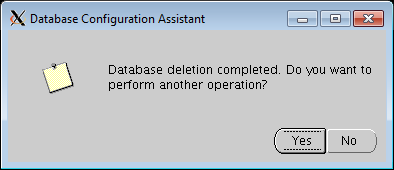
- Final confirmation screen to perform another operation.
- Also you may monitor the progress of the database deletion from the alert log, please note the alert log will be removed after the database is removed.
Wed Apr 08 10:28:07 2015
ALTER SYSTEM SET cluster_database=FALSE SCOPE=SPFILE;
Shutting down instance (immediate)
Stopping background process SMCO
Shutting down instance: further logons disabled
Stopping background process QMN
...... Summmarized output
Completed: ALTER DATABASE CLOSE NORMAL
Deleted Oracle managed file +RECO_EXAD/odsdev2/archivelog/2015_04_08/thread_1_seq_21807.49154.876479305
...... Start the database with cluster_database set to false
Completed: ALTER DATABASE MOUNT
ALTER SYSTEM enable restricted session;
DROP DATABASE
Deleted Oracle managed file +DATA_EXAD/odsdev2/datafile/system.459.791624835
Deleted Oracle managed file +DATA_EXAD/odsdev2/datafile/sysaux.457.791624821
...... Dropping of files from ASM associated with database
You will notice in ASM the directory for the database and its contents are removed as well also all RAC services registered to the Clusterware are also removed for you automatically!
Below is even an easier way to invoke dbca to drop a database via the command line.
The database must be running when you do this. Thanks to Charles Kim for sharing this with me.
RMANDR - oracle: cat del_DBATOOLS_dbca.txt
dbca -silent -deleteDatabase -sourceDB DBATOOLS -sysDBAUserName sys -sysDBAPassword ChangemeSys!
RMANDR - oracle: ksh del_DBATOOLS_dbca.txt
Connecting to database
4% complete
9% complete
14% complete
19% complete
23% complete
28% complete
47% complete
Updating network configuration files
52% complete
Deleting instance and datafiles
76% complete
100% complete
Look at the log file "/apps/oracle/cfgtoollogs/dbca/DBATOOLS.log" for further details.
Subscribe to:
Posts (Atom)